An event with multiple sessions allows you to offer your employees appointments to book.
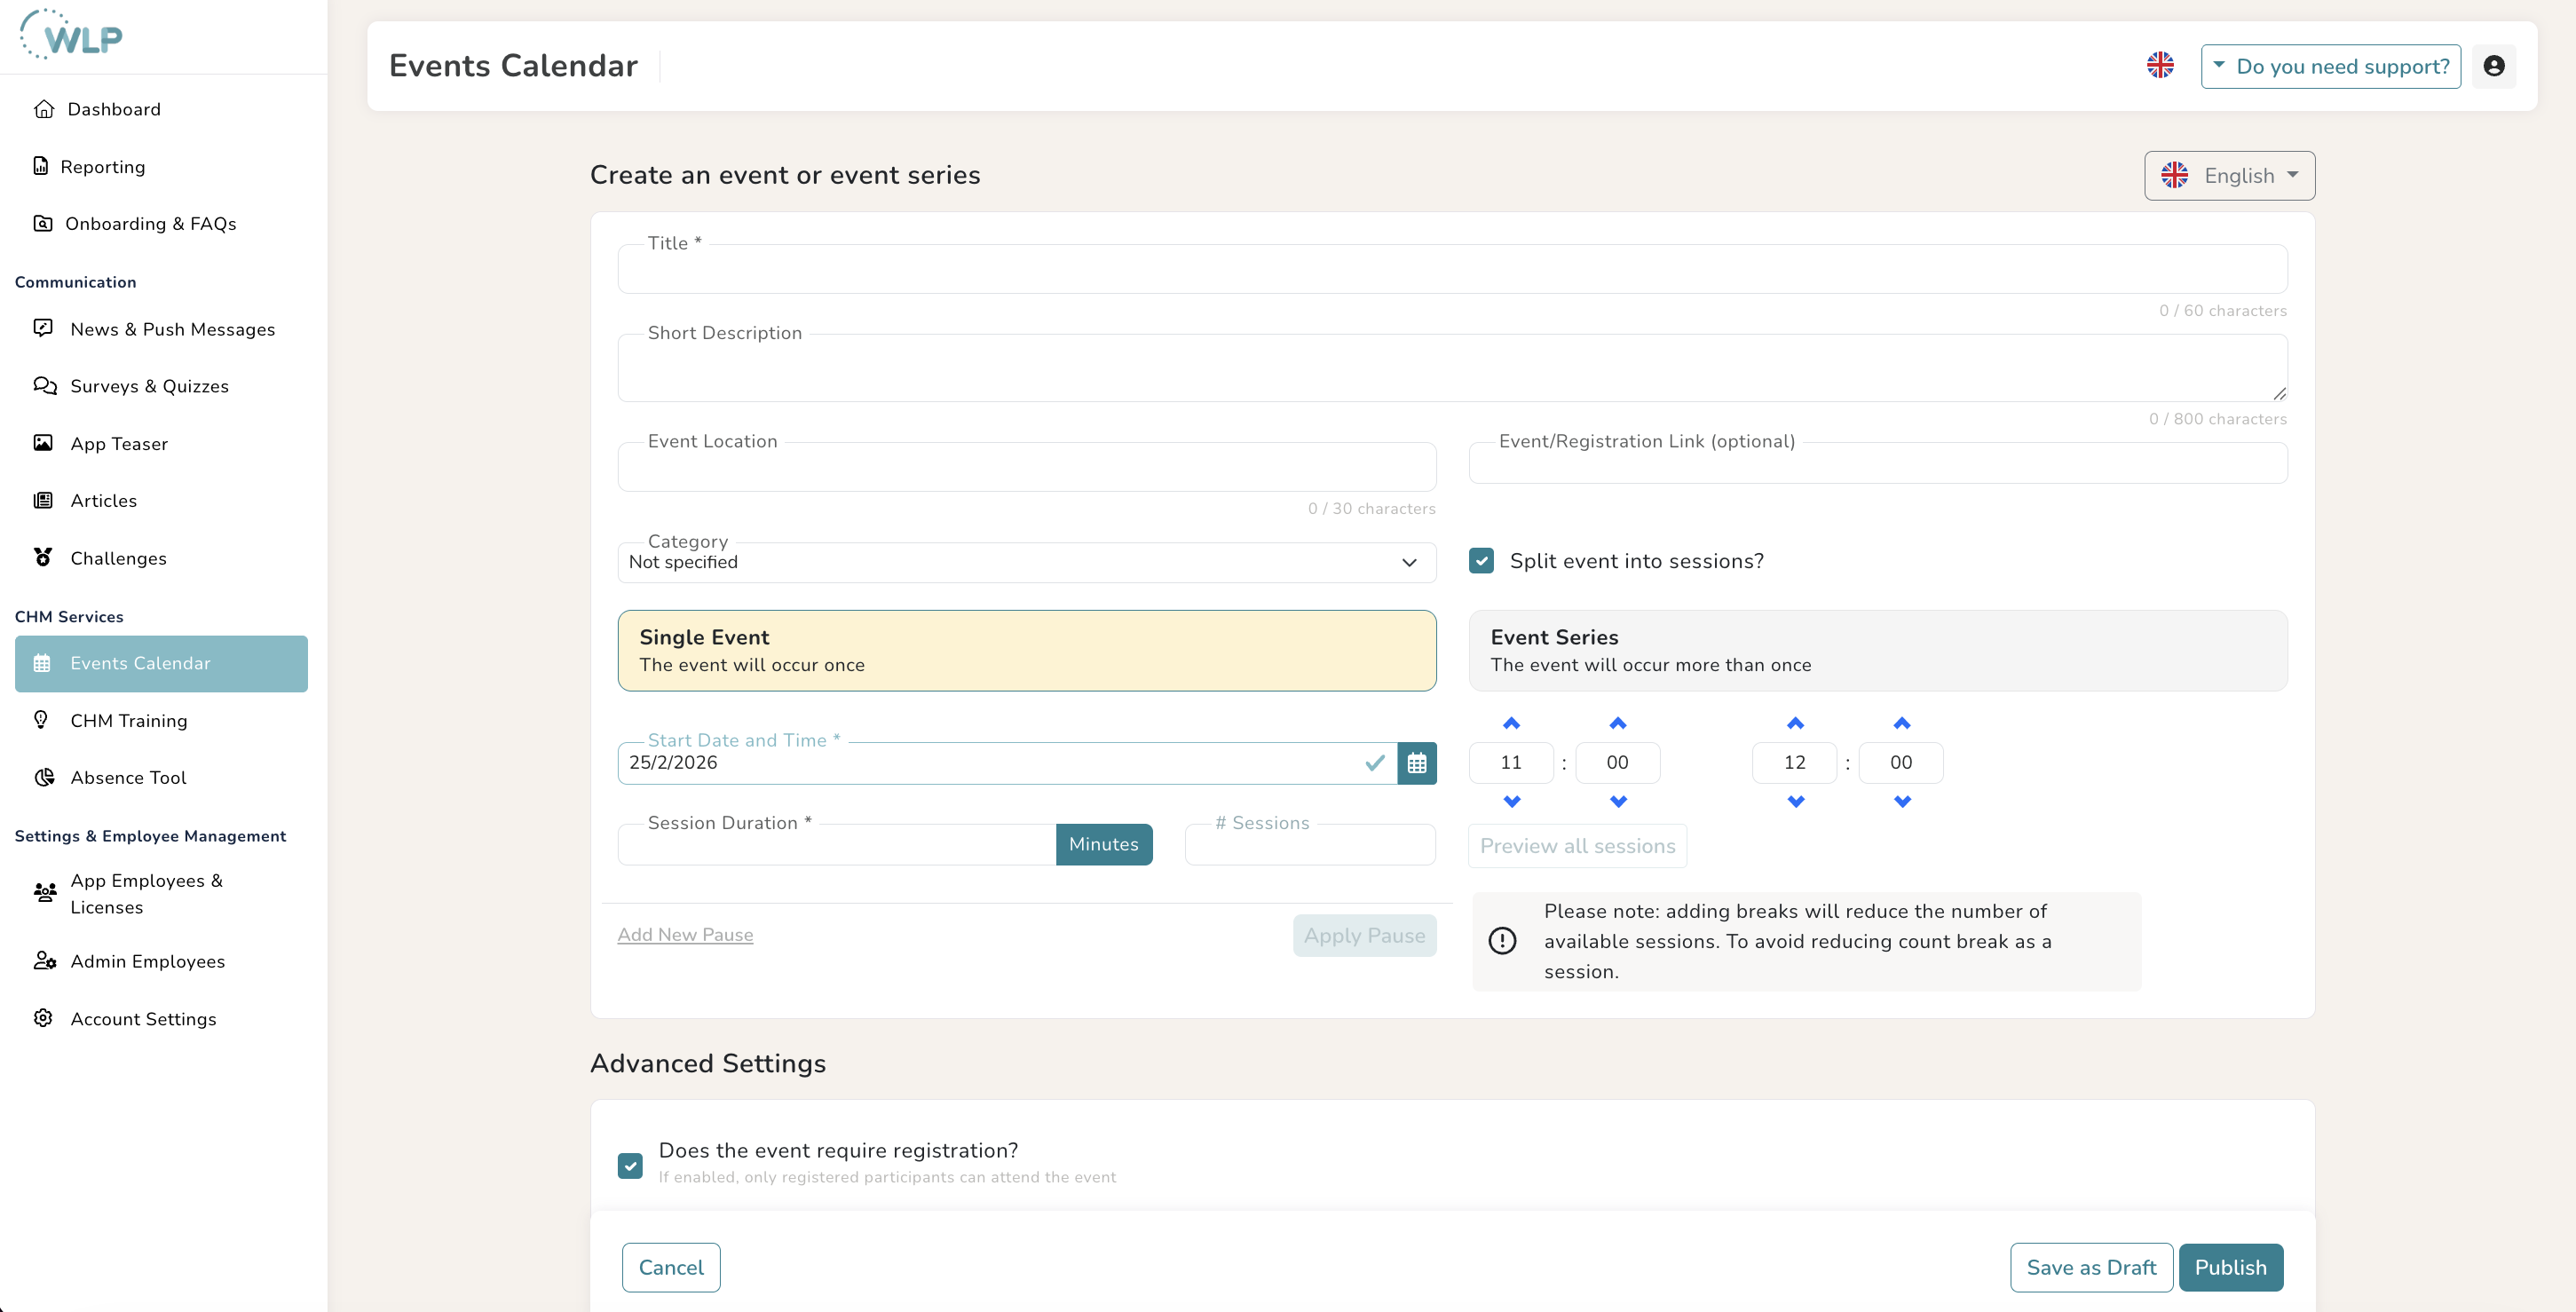
To create an event with multiple sessions in the calendar, click on “Event Calendar” in the menu on the left under “CHM Services” Then click on the “Add Event” button on the right. Now follow the steps under “Create an Event”.
Check the box next to “Split event into sessions?”
Now select:
- the start and end date of your event
- then enter the “Duration in min.”
- The “# Sessions” will now be displayed as a number.
- If you now click on “Add New Break,” you can enter up to 3 breaks.
- As soon as you click on “Add New Pause,” the break will be calculated in the sessions and the number of sessions will be reduced automatically.
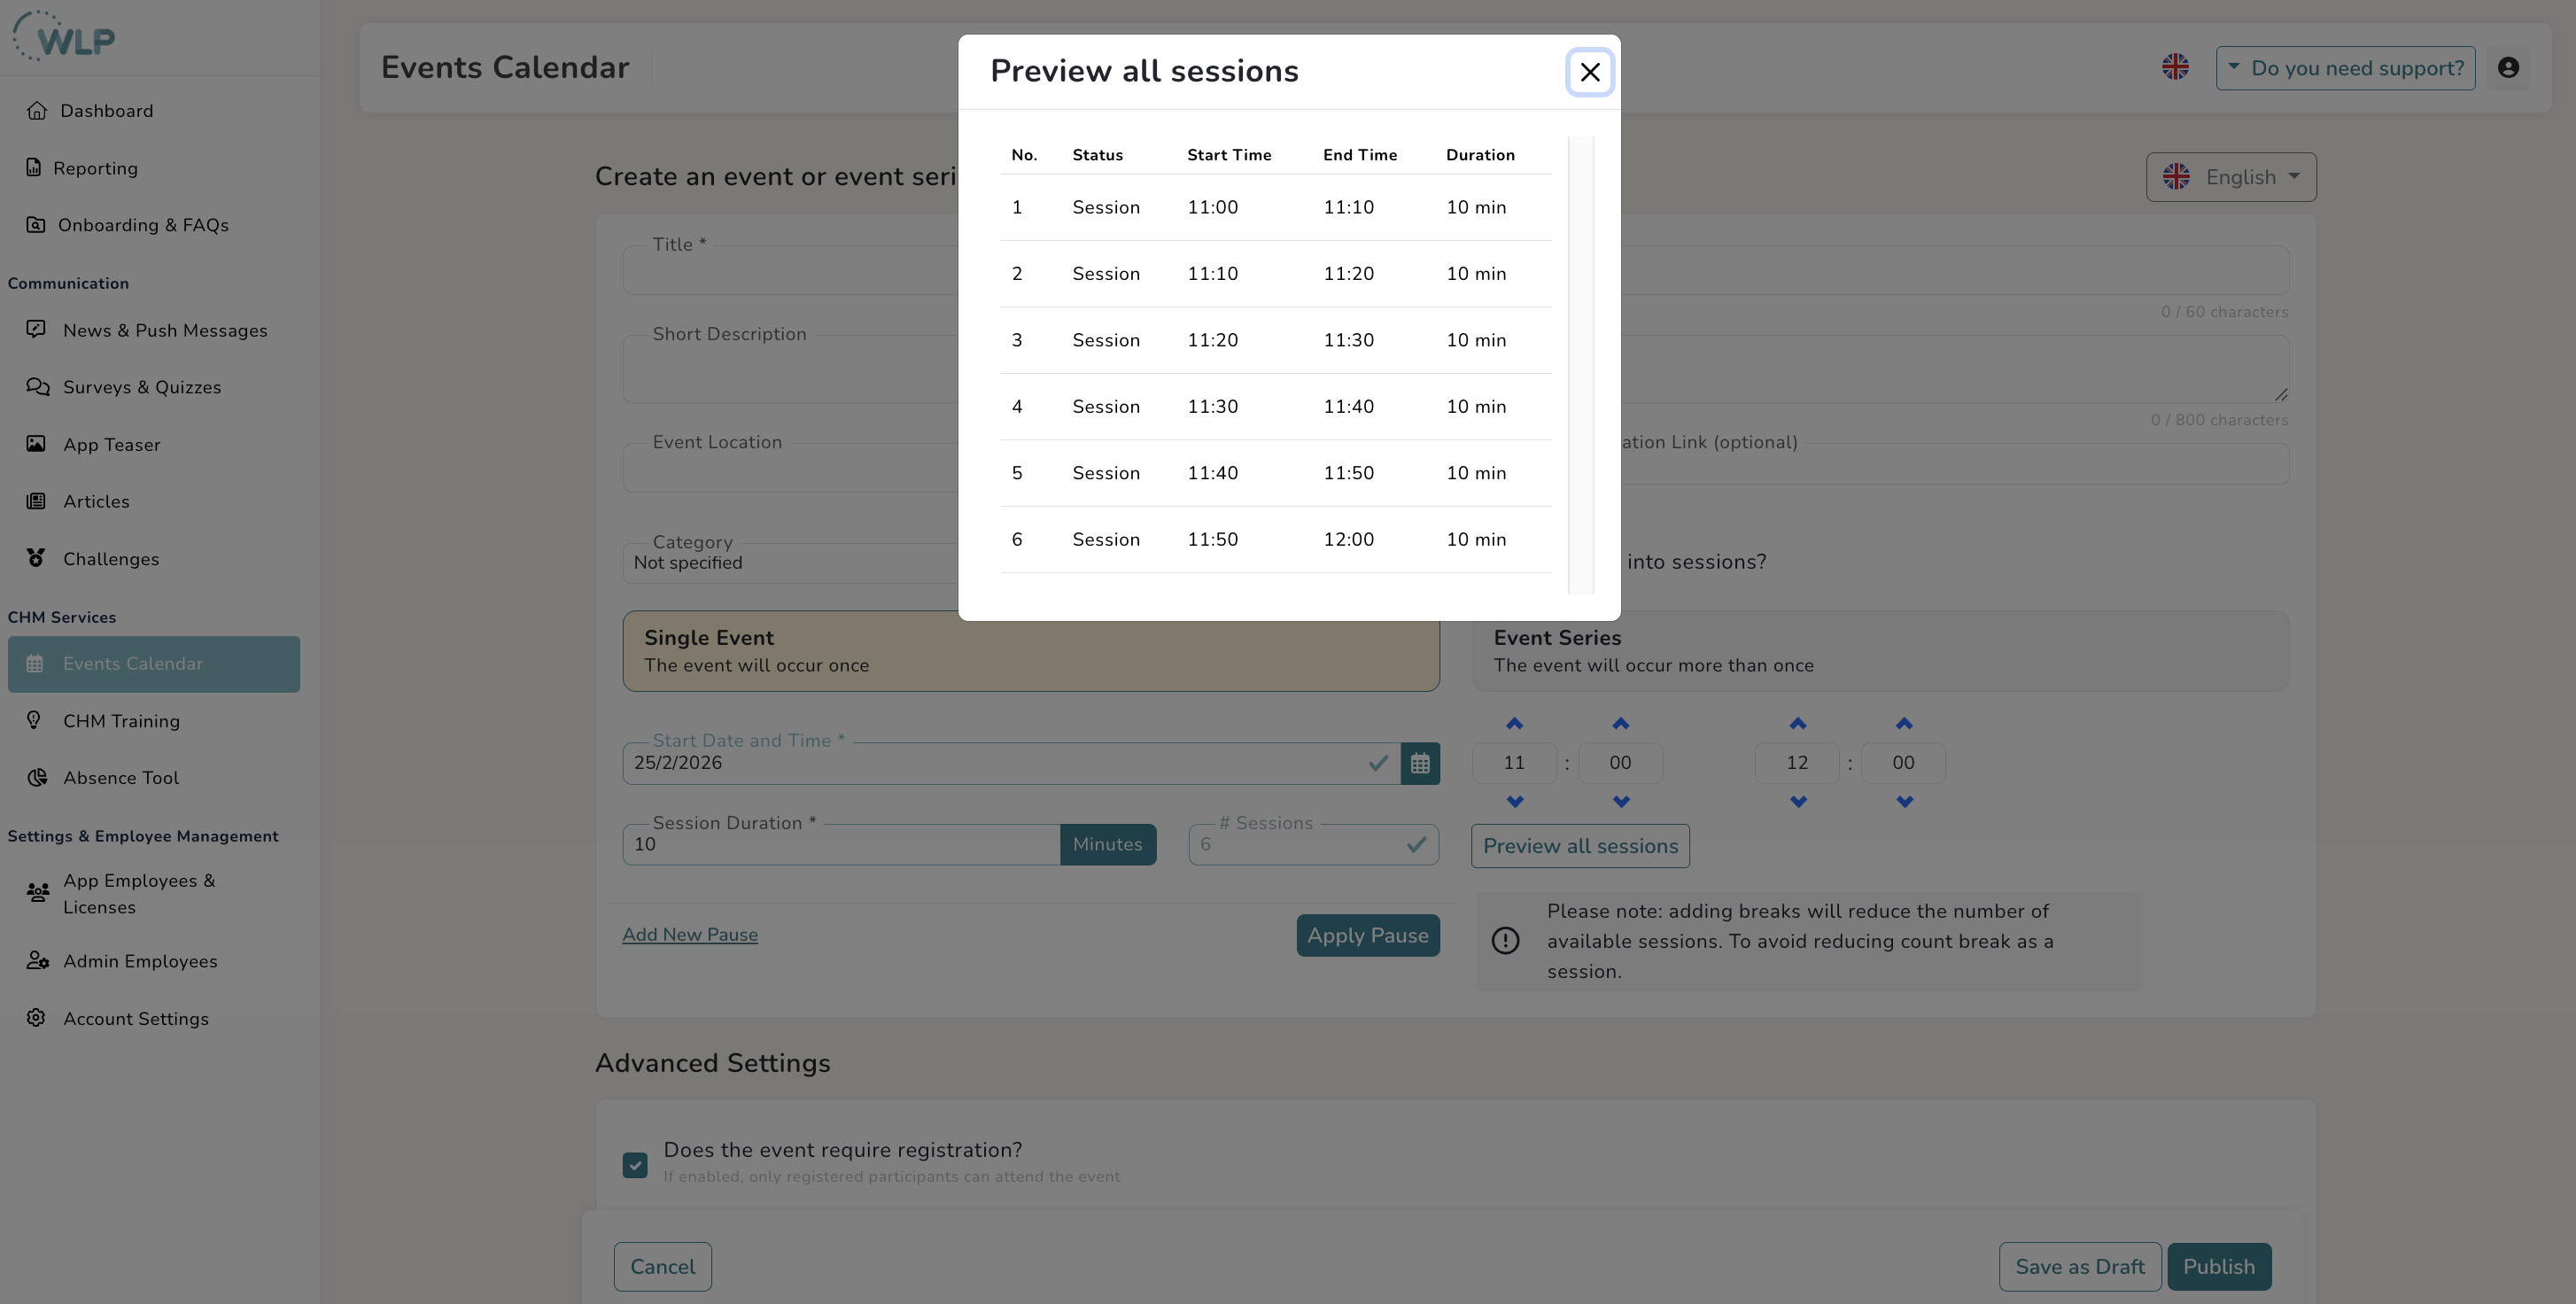
- You can view an overview of the division by clicking on “Preview All Sessions.”
Note:
- Creating multiple sessions does not work for events lasting several days. So if you have 3 consecutive days of events with 5 sessions each, you need to create 3 separate events in the WLP back office. Please note: You cannot edit an event that has already started.
Tip for you:
Don't want to publish your event right away? Then click on “Save as draft” to continue editing later.
Was this article helpful?
That’s Great!
Thank you for your feedback
Sorry! We couldn't be helpful
Thank you for your feedback
Feedback sent
We appreciate your effort and will try to fix the article